
Hidden Bookends
This project is calling my name. I love to put books on small shelves, on floating shelves, and other places where there simply is no room to add the bookends needed to hold them there. So when I saw these seemingly invisible bookends, I knew it was a simple answer to my dilemna.
What’s unique about these is that the top of the bookend isn’t just sticking up into the book, which isn’t stable enough if the book is fairly thin, but the pages are removed and replaced with a piece of wood that the bookend is then glued to. That way the book can’t accidentally fall off.
Obviously you don’t want to use a book you want to keep for this, so go to a thrift store and pick up a couple of not too thick, pretty books. To make two bookends, one for each end, here is what you’ll need.
Supplies (for two bookends):
- 2 books with 1″ spines
- 2 thin metal bookends
- 1×6 board or a board of another dimension to fit your book
- super glue (I used gorilla glue)
- clamps
- craft blade
Selecting Your Book and Lumber Size: My books measured about 5.75″ deep, 8.25″ high, and 1″ thick. It’s important to find a book depth that will correspond with lumber standard widths, so you don’t have to do any unnecessary cutting of the lumber later. This is why I used a book with a 1″ spine. I used a 1×6 board to fill the inside of my book, which really measures .75″ x 5.75″. This board fit my book dimensions perfectly! How did I know that would happen? Well, I brought my book spine to the lumber yard with me!
Step 1: Use a sharp craft blade or razor to cut away the contents of the book from its spine.
Step 2: Wrap the book spine around your lumber to mark where to cut the lumber. I left about a 1/8″ gap at the top to achieve a more realistic book effect.
Step 3: Cut the board to the length you marked. If you don’t have a saw at home, you can do this at the lumber yard. They will make cuts for you for free.
Step 4: Cover the wooden blocks and metal bookends with moderate amounts of Gorilla Glue, as shown above. Don’t get too close to the edges or it will seep out. Gorilla Glue foams and expands as it’s clamped, which makes for a strong hold, but a messy final product if you’re not careful when applying the glue.
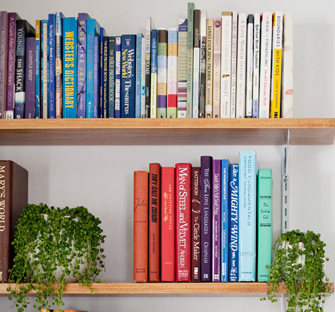
Step 5: Once everything is all glued into place, use clamps to press it all together as the glue sets up. You should use scrap lumber as a buffer between the book and the clamps or the clamps will leave indents in your book. I made the mistake of not doing this, and got some pretty visible denting, especially on my orange book. Thankfully the dents aren’t noticeable on my shelves.
Mandi Johnson from A Beautiful Mess devised these clever bookends and we thank her for sharing them. She’s got photos detailing every step she took making them so if you think they will help, hop over to her blog.
Image and Project Source: A Beautiful Mess


